

Area of Trapezoids made easy.
In the world of quadrilaterals, the formula to find area of Trapezoids is one of the most feared by middle school students. Perhaps it’s the use of parentheses. If you throw these bad boys into a problem it’s sure to create a certain level of anarchy. Possibly it’s the use of the numbers 1 and 2 written below and to the right of the two bases (b) in the parentheses.
Regardless of of the reason, the formula for Area of Trapezoids has caused many kids to surrender without so much as a fight.
The kicker is that the formula is not difficult to solve. In this blog we will look at a couple of the key terms, dissect the formula, give three examples of finding area and show you a three ways to model finding the area.

Above: Two different formulas to find Area of Trapezoids
The Trapezoid
In the world of quadrilaterals, the formula to find area of Trapezoids is one of the most feared by middle school students. Perhaps it’s the use of parentheses. If you throw these bad boys into a problem it’s sure to create a certain level of anarchy. Possibly it’s the use of the numbers 1 and 2 written below and to the right of the two bases (b) in the parentheses.
Regardless of of the reason, the formula for Area of Trapezoids has caused many kids to surrender without so much as a fight.
The kicker is that the formula is not difficult to solve. In this blog we will look at a couple of the key terms, dissect the formula, give three examples of finding area and show you a few ways to model finding the area.
Key Terms
There are two key terms in the world of the Trapezoid: Bases and Height.
The Bases are two sides that are parallel. Trapezoids have only one set of parallel sides. The Height can also be thought of as the distance between the bases. In most examples, the two bases are on the top and the bottom, but if you rotate the trapezoid 90 degrees the bases are now on the right and left sides.

Area of Trapezoid Formula
There are two common formulas that you will see used when finding the area of a trapezoid:
Area = 1/2 (Base 1 + Base 2) x height or
Area = (Base 1 + Base 2) divided by 2 x height
It’s important to understand that dividing by 2 and multiplying by 1/2 are the same thing. For example, 10 divided by 2 equals 5 and 10 times 1/2 also equals 5.
What is helpful to understand is that 1/2 (Base 1 + Base 2) and (Base 1 + Base 2) divided by 2 are both just ways of finding the average of the two bases. You can think of this as the Mean or the Median it doesn’t matter. So really Area of a Trapezoid is just the Average of the Bases x Height (or the distance between the bases)
3 Examples of Finding area of Trapezoids

Example #1
In this example we have a trapezoid with a bases of 13 and 7 and a height of 3. First we add up our bases to get 20 (13 + 7). Next we multiply 20 by 1/2 to get 10. (We could have divided by 2 instead of multiplying by 1/2). Finally we take 10 (which is the average of the two bases) and multiply it by the height (3) to find the area of this trapezoid which is 30 square units.

Example #2
In this example we have a trapezoid with a bases of 10 and 6 and a height of 6. First we add up our bases to get 16 (10 + 6). Next we multiply 16 by 1/2 to get 8. (We could have divided by 2 instead of multiplying by 1/2). Finally we take 8 (which is the average of the two bases) and multiply it by the height (6) to find the area of this trapezoid which is 48 square units.

Example #3
In this example we have a trapezoid with a bases of 10 and 6 and a height of 3. First we add up our bases to get 16 (10 + 6). Next we multiply 16 by 1/2 to get 8. (We could have divided by 2 instead of multiplying by 1/2). Finally we take 8 (which is the average of the two bases) and multiply it by the height (3) to find the area of this trapezoid which is 24 square units.
3 Ways to model Finding the area of Trapezoids
Example #1
This is an example of a Trapezoid when the “triangles” are the same on both sides.
One of the goals of modeling area of a trapezoid is to show how we can convert a trapezoid into a rectangle. In the above example, we have two equal “triangles” on each side. This trapezoid has bases of 12 and 4 with a height of 4.
First, we can cut off one of the two triangles. We are then going to move it to the other side.
Once we move the triangle from one side to the other (in this example right to left) we can arrange the triangle to fit perfectly and form a rectangle. In this example an 8 x 4 rectangle is created which has an area of 32 units squared.
Example #2
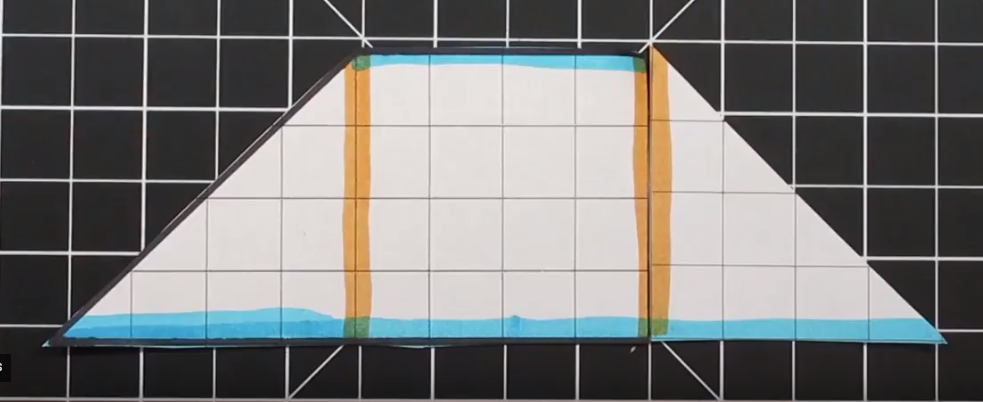
This is an example of a trapezoid with two right angles. As a result there is only one “triangle.”
This Trapezoid has two right angles on the left side. There is a triangle on the right side. The Trapezoid has bases of 6 (on top) and 10 (bottom) along with a height of 5.
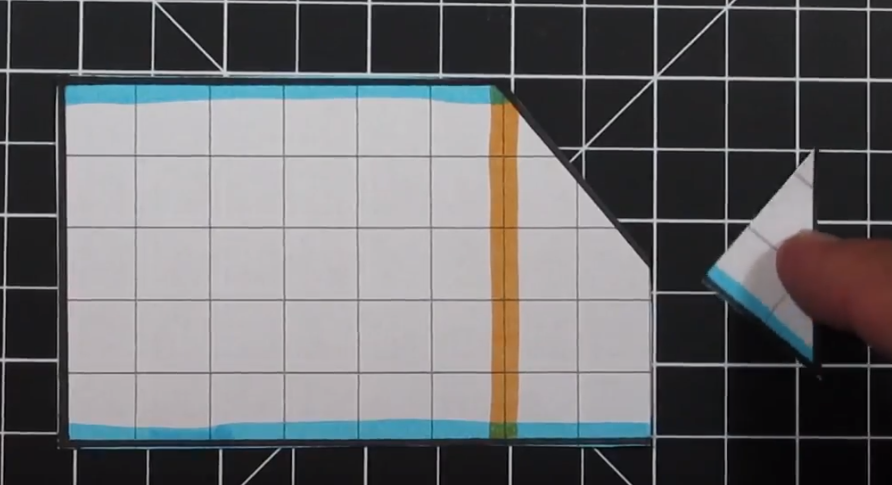
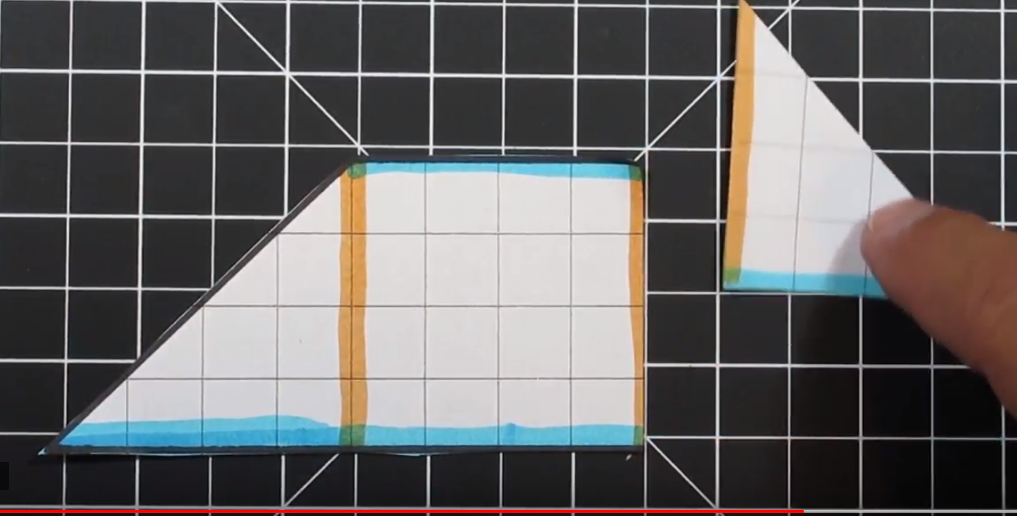
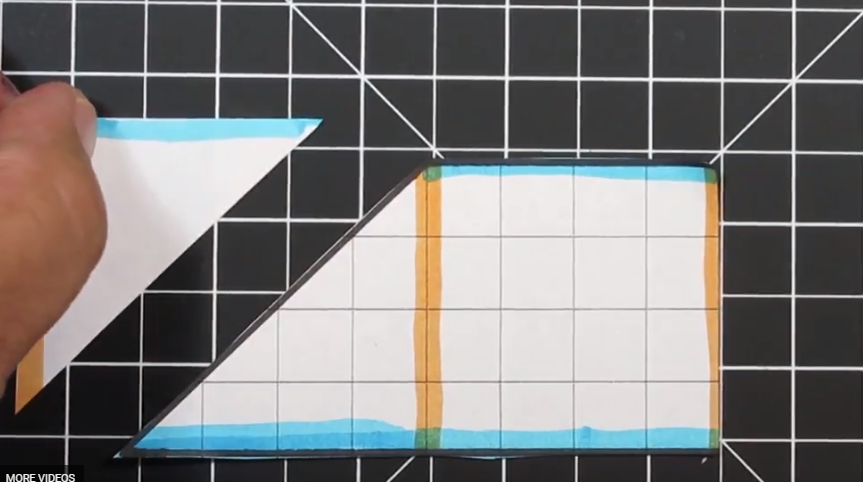
To transform this trapezoid into a rectangle we are going to cut the triangle in half (half of the base of the triangle). Next we are going to take the piece we cut off and move to the upper right to create a rectangle.
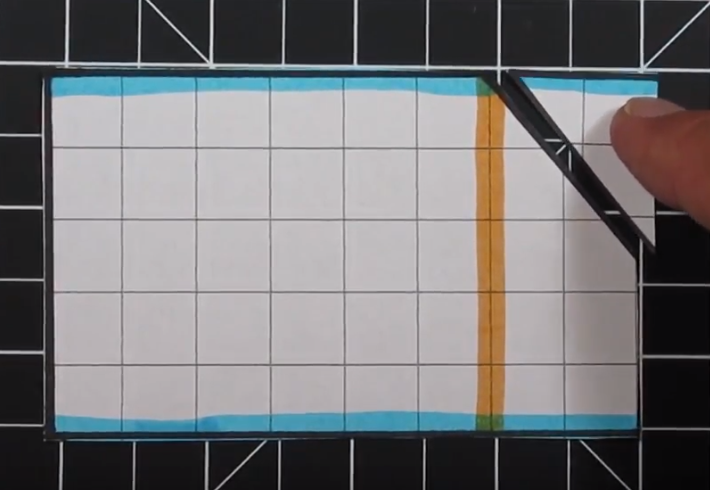
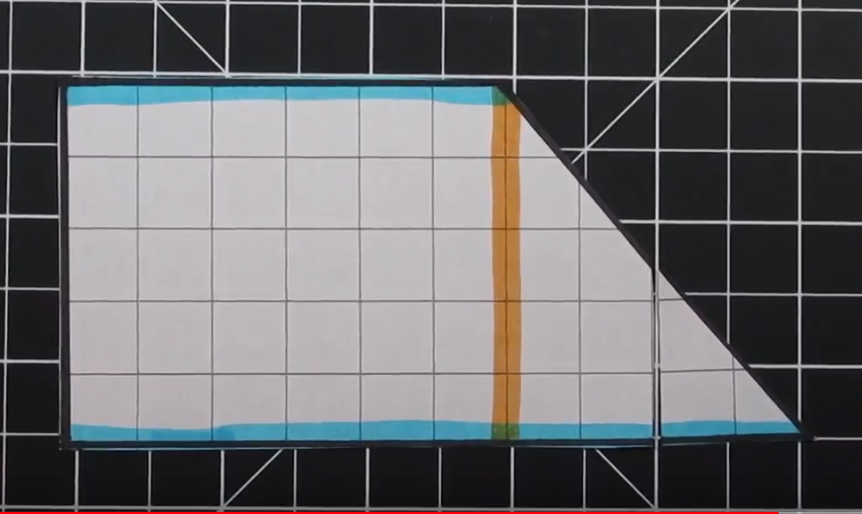
Finally, once we rearrange the trapezoid we can create a rectangle with a base of 8 and a height of 5. This equals an area of 40 cm squared.
Example #3
This an example of a trapezoid with triangles on each side, but both have a different base.
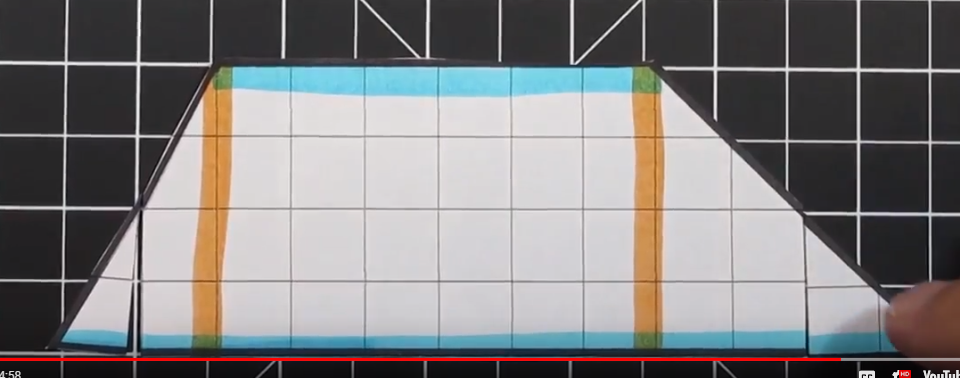
This trapezoid is similar to the trapezoid in Example #1. The big difference is the two triangles have a different base. So just like in Example 2, we are going to need to cut both triangles in half.

In this example, we are cutting the triangle on the right side in half and rearranging it .
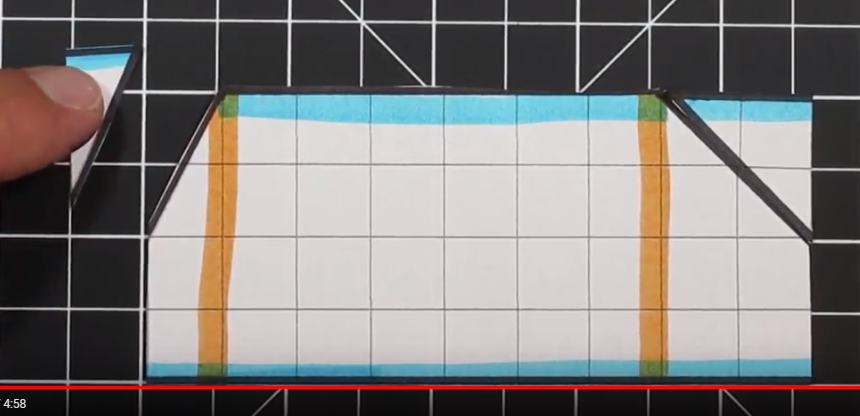
Next, we do the same thing to the triangle on the left side.
Once we rearrange the trapezoid, a rectangle with a base of 9 and height of 4 has been created. The area is 36 square units which is easy to see when we rearrange the trapezoid.
Watch the Video !
Check out: Finding the Area of Unique Shapes.
A collection of 44 different Shapes using triangles, quadrilaterals (including trapezoids) and circles.


Area of Squares, Rectangles, Rhombuses, & Parallelograms
If you ever google: "How to find the area of a Square? Rectangle? Rhombus? or Parallelogram?" You are going to find a bunch of different answers.
For a Square, the formula given will be the Side Squared. The Rectangle's formula given is Length x Width. To find the area of a Rhombus you are given two different formulas: Base x Height or Diagonal #1 x Diagonal #2 divided by 2. Finally, the Parallelogram's formula for area is Base x Height.

All of these formulas are obviously correct, but you can make your life much simpler (or at least your kids) just using one simple formula:
Base x Height.
How is this even possible? The reason it's possible is because all four objects are Parallelograms. For a lot of students, it doesn't make sense how a Square, Rectangle and Rhombus are also Parallelograms. Below are the rules for an object to qualify as a Parallelogram.
Must have 4 sides
All 4 sides must be straight
Opposite sides must be the same length
Opposite sides must be parallel (so there are two sets of parallel sides)
Opposite angles must be the same

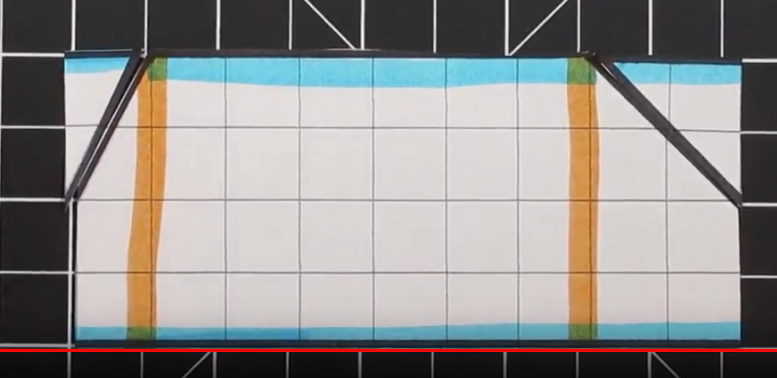
To the right we can see that the Square, Rhombus, and Rectangle each have a total of four sides and each of the sides are straight lines.
The blue and orange highlighted sides are parallel with each other. So each object has a total of two sets of parallel sides.
The green arcs (angles) are opposite of each other. These two angles are the same. In the Square and Rectangle all the angles are 90 degrees, but in the Rhombus the two opposite green angles are both acute angles (less than 90 degrees).
Opposite black arcs (angles) are also the same. In the Rhombus the opposite blacks arcs are each obtuse angles.
Because all 4 shapes (square, rectangle, rhombus & parallelogram) are parallelograms we can just use BASE x HEIGHT to find the area of all four of these shapes.
Modeling Area of Parallelograms
Squares and Rectangles are the two easiest shapes to model. Grid paper is a very easy way to show this to students.
On both of these images not only can you see the base and height but you can visualize the individual squares that make up the rectangle and square. So when we say the area of the rectangle is 10 cm squared we can see 10 squares that have sides that are each 1 cm


Modeling with Cheez-its
An easy way to engage students is to use Cheez-its (or other square food items like Starburst) when modeling. It's a simple way to turn this into a hands on lesson and the kids like the payoff at the end.
Modeling a Rhombus or Parallelogram (non square/rectangle)
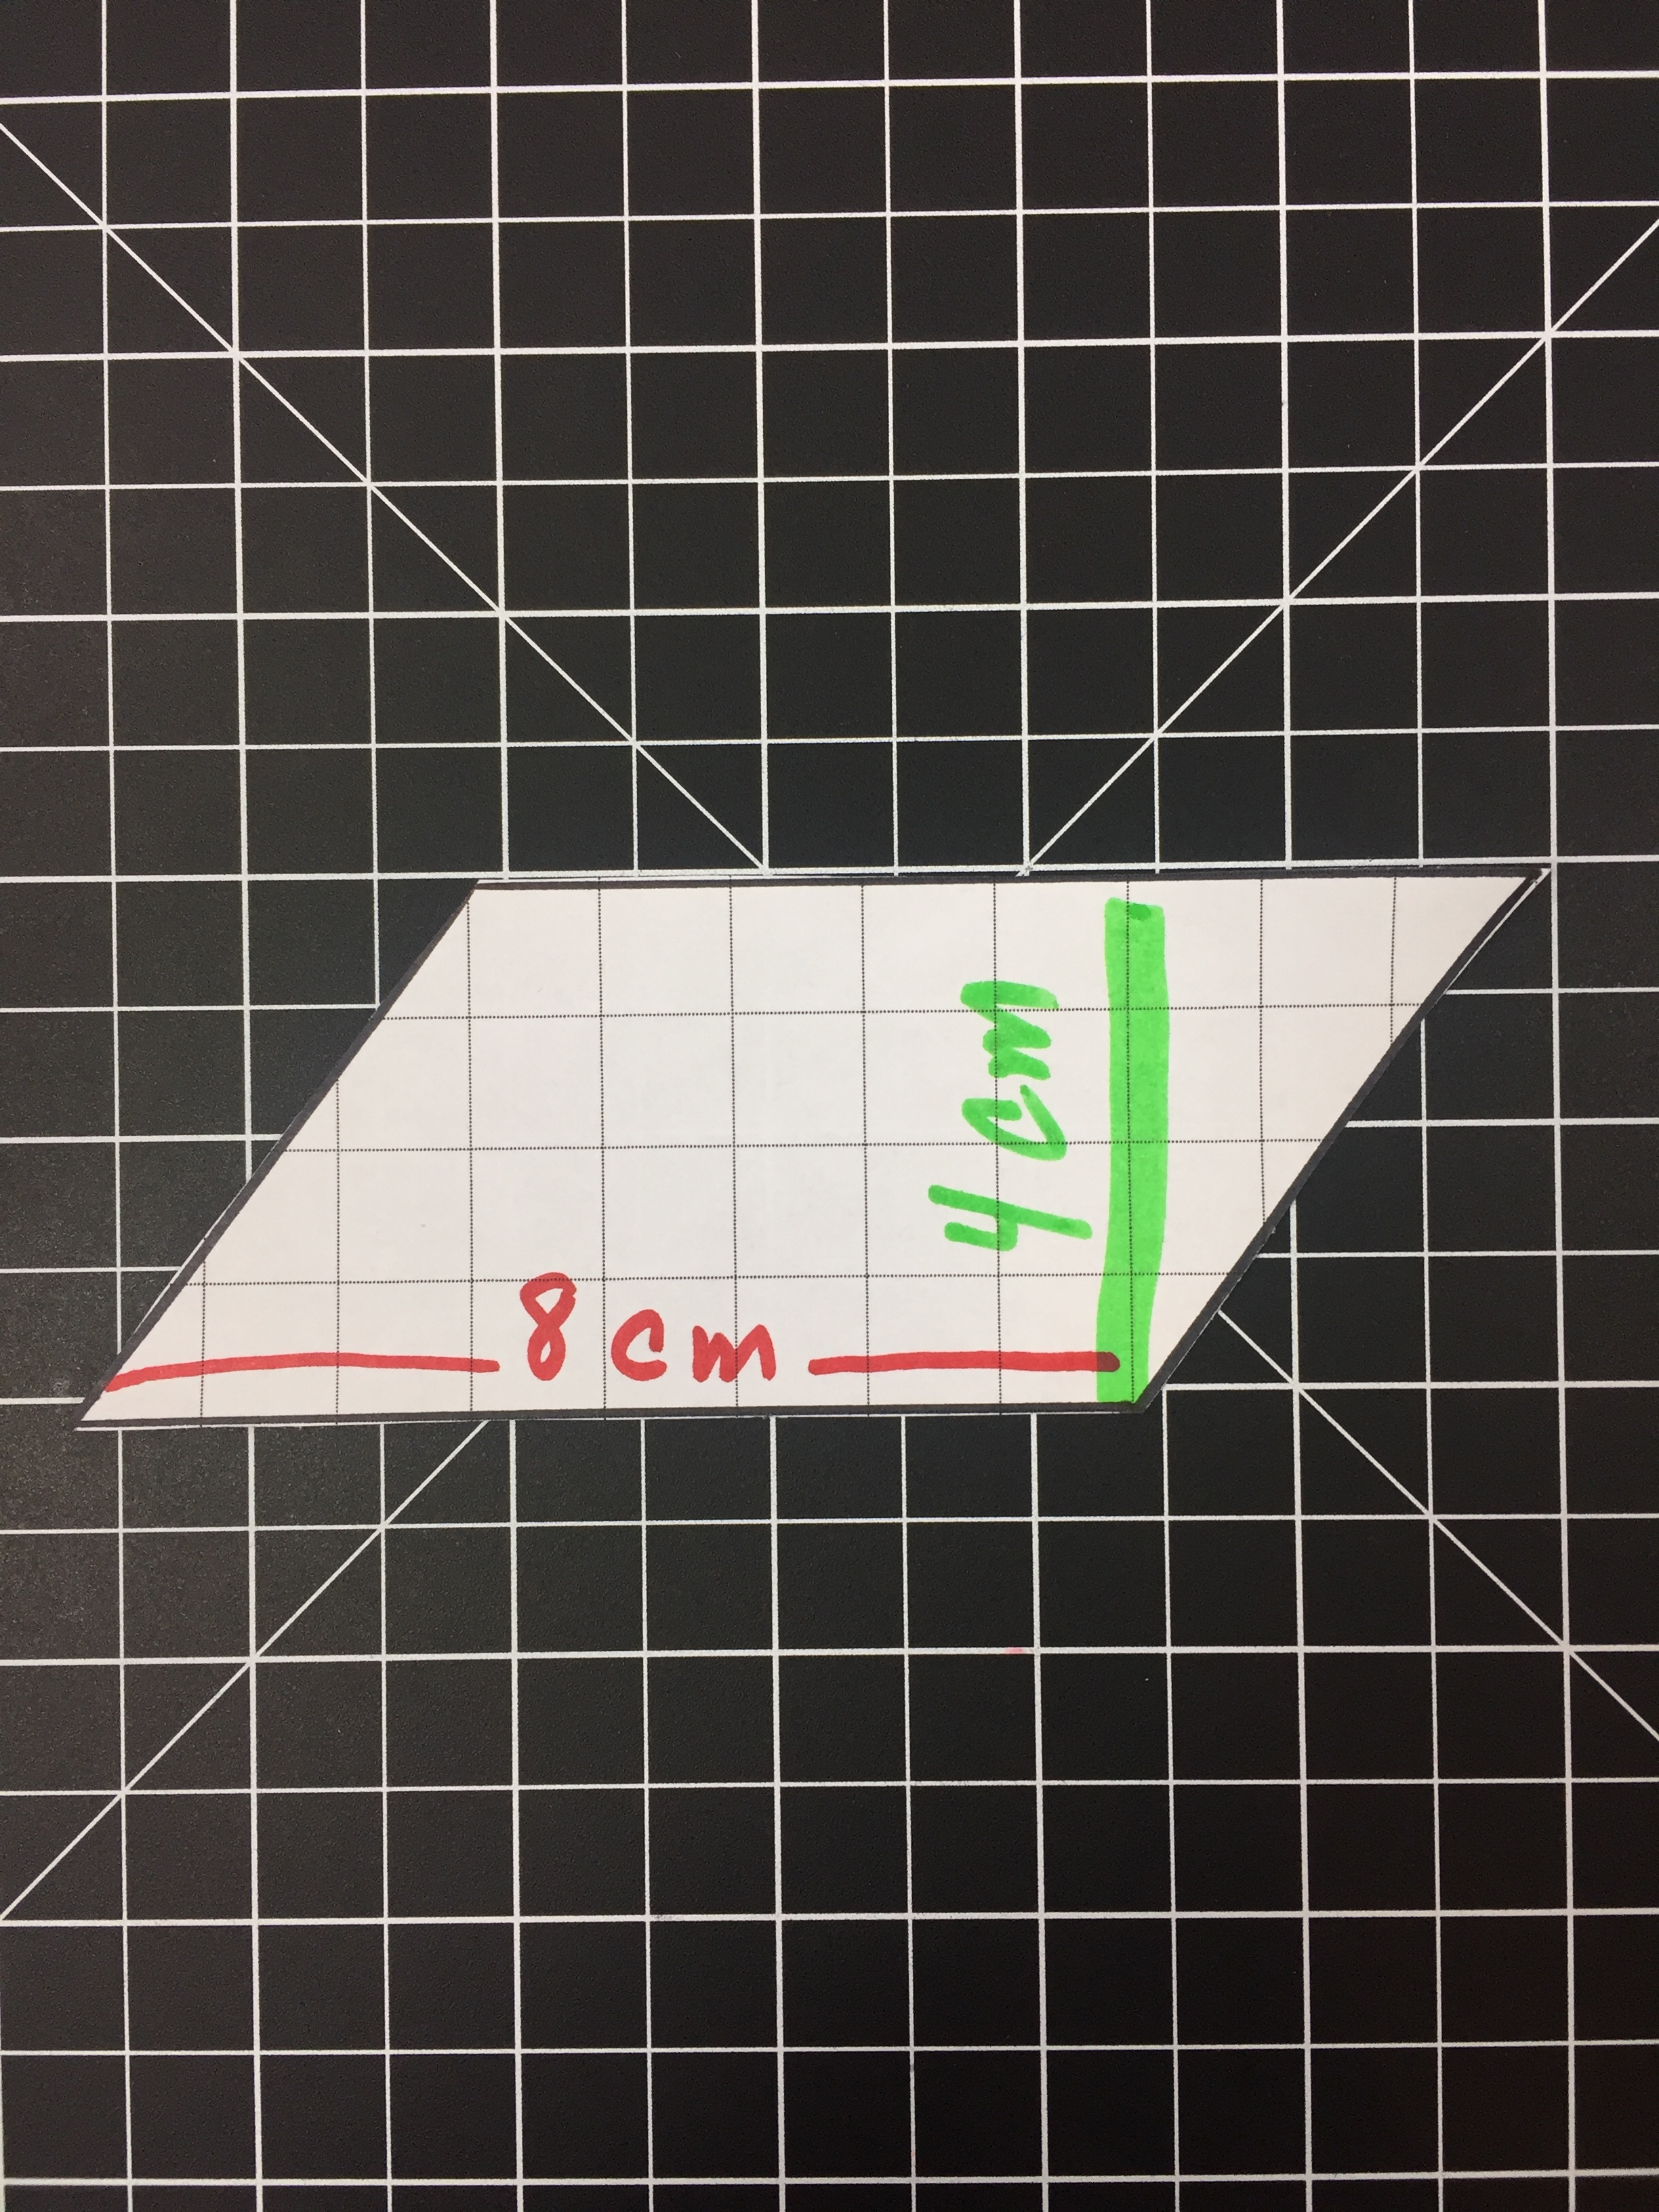
Modeling the area of a Rhombus or parallelogram is a bit harder with cheez-its (cutting up a cheez-its = pure mess). But it is fairly easy to model with grids. We can even turn the grids into a hands on lesson.
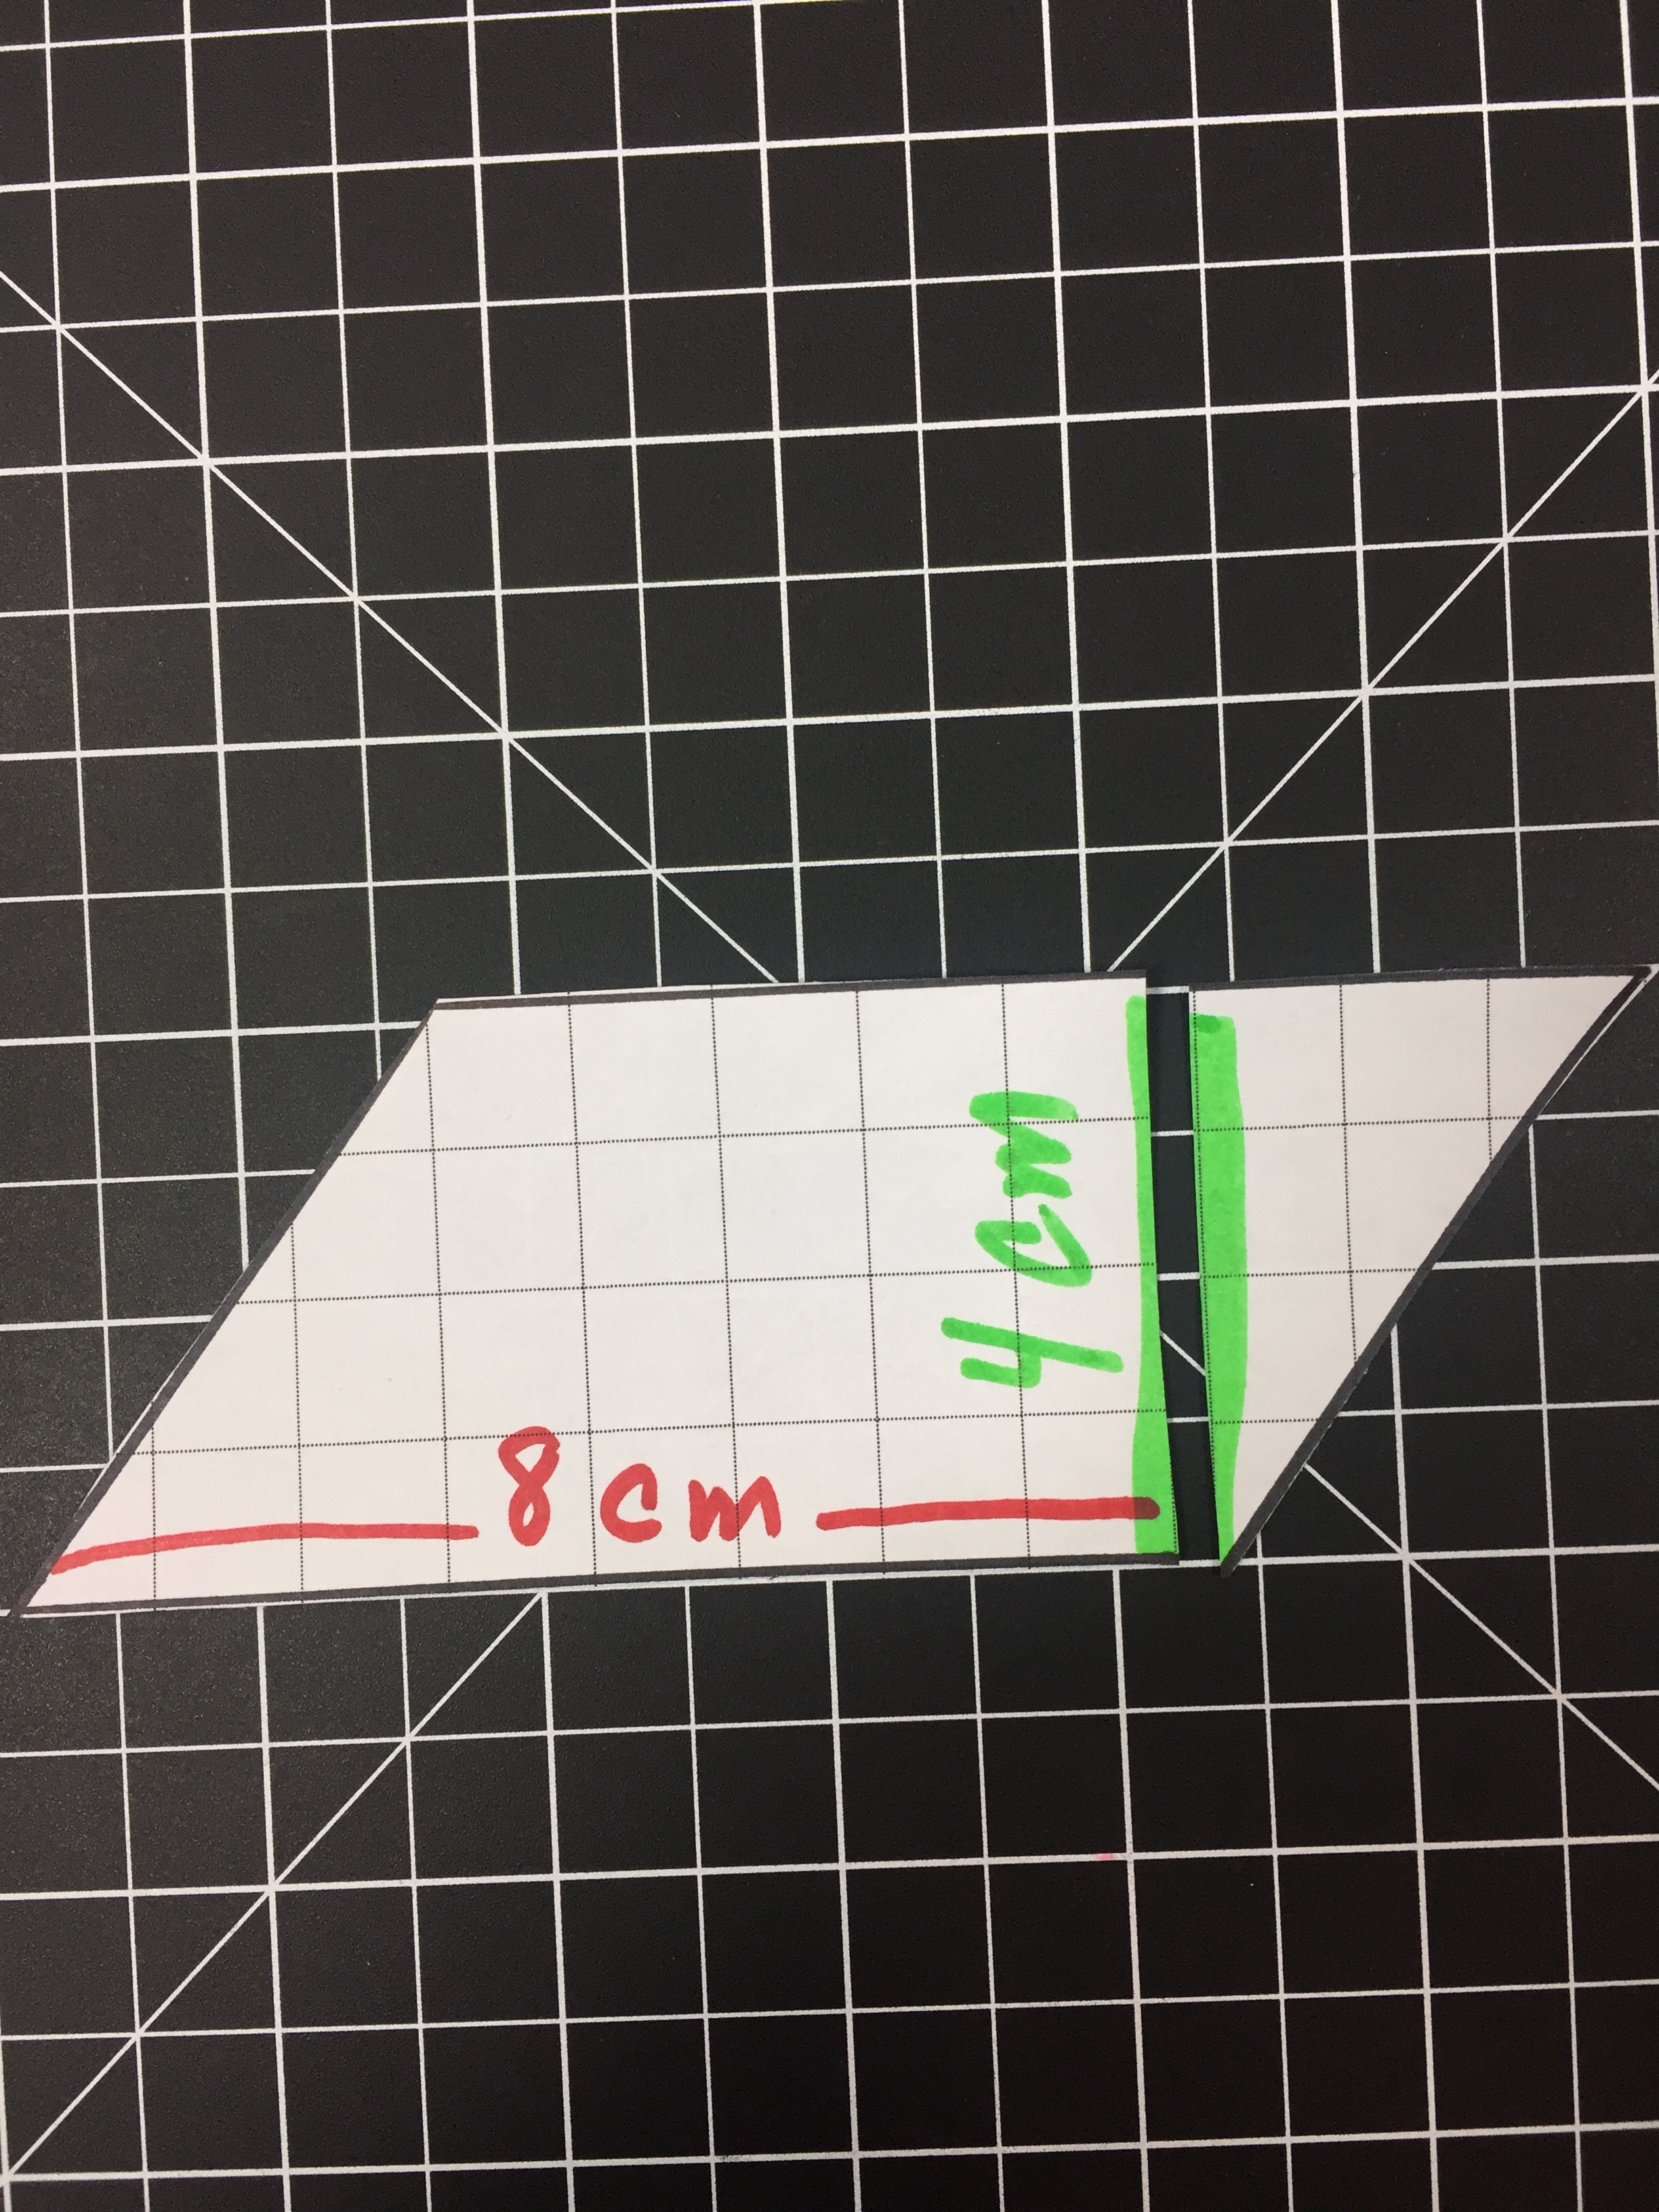
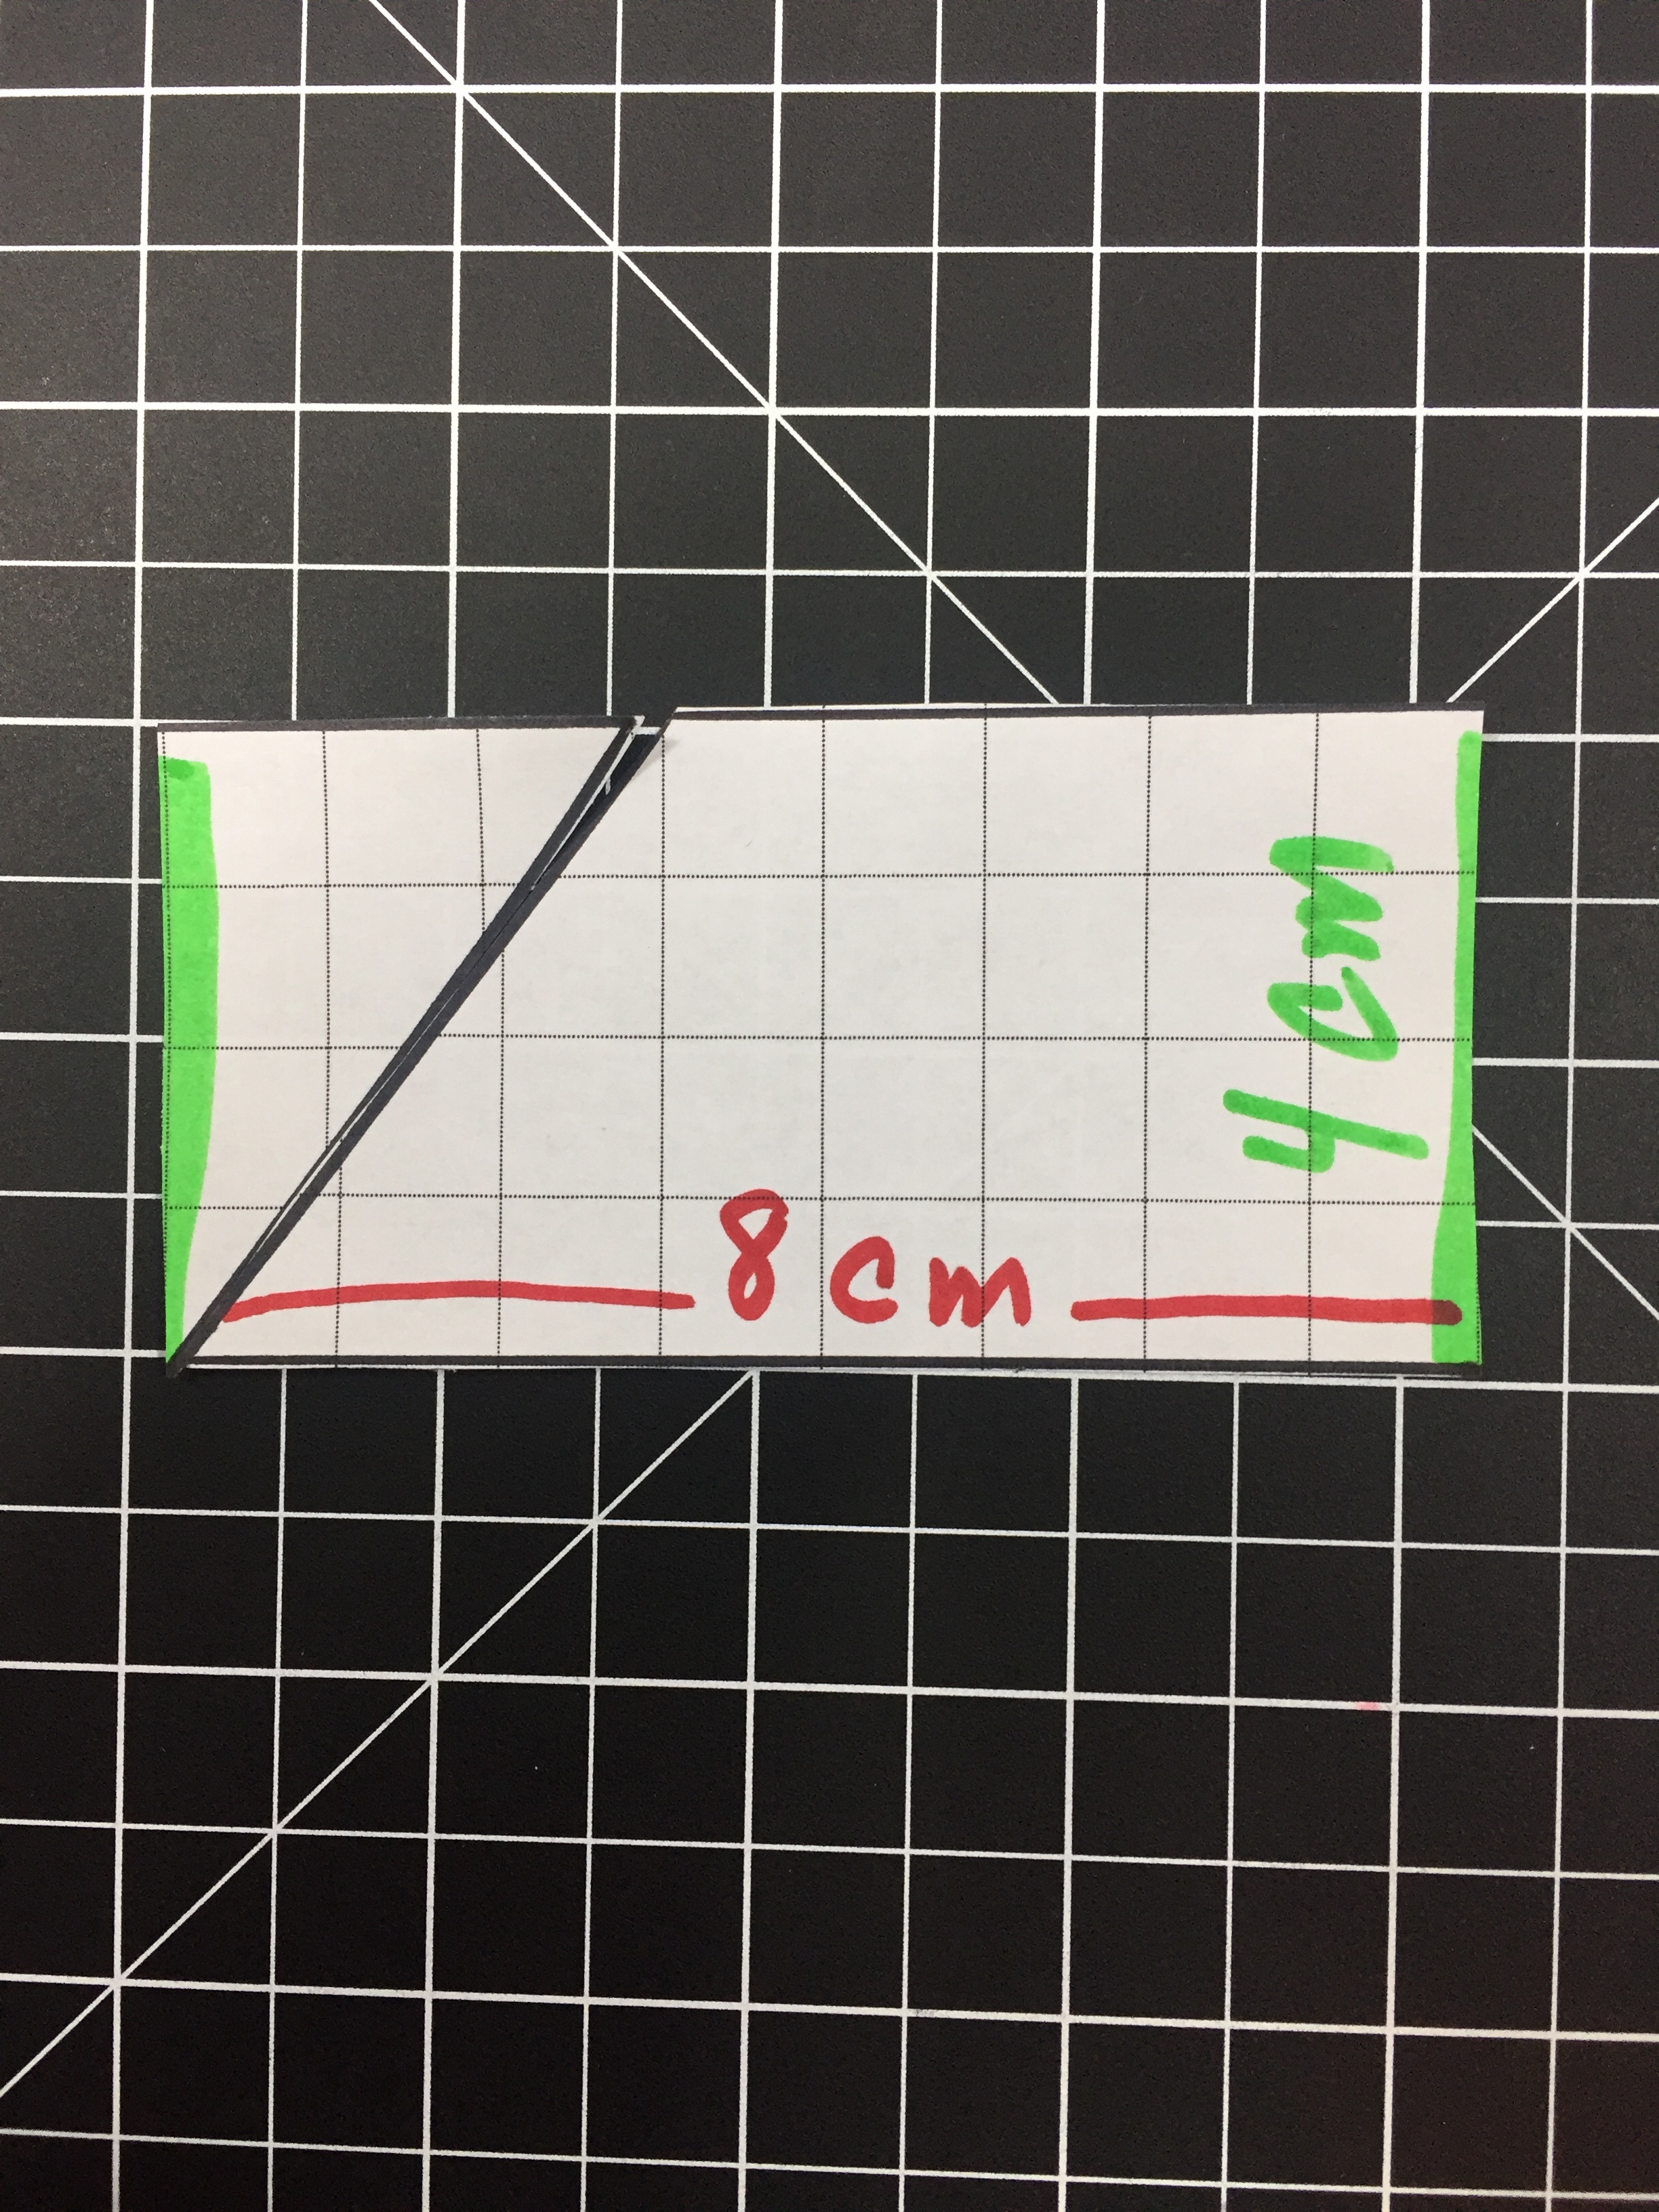
Below we have a Parallelogram (base of 8 with a height of 4) and cut it into two pieces by cutting on the height. We can rearrange the two sections to form a rectangle with a base of 8 and a height of 4 (same dimensions as before). By rearranging the Parallelogram we can visualize the 32 squares that make up the area
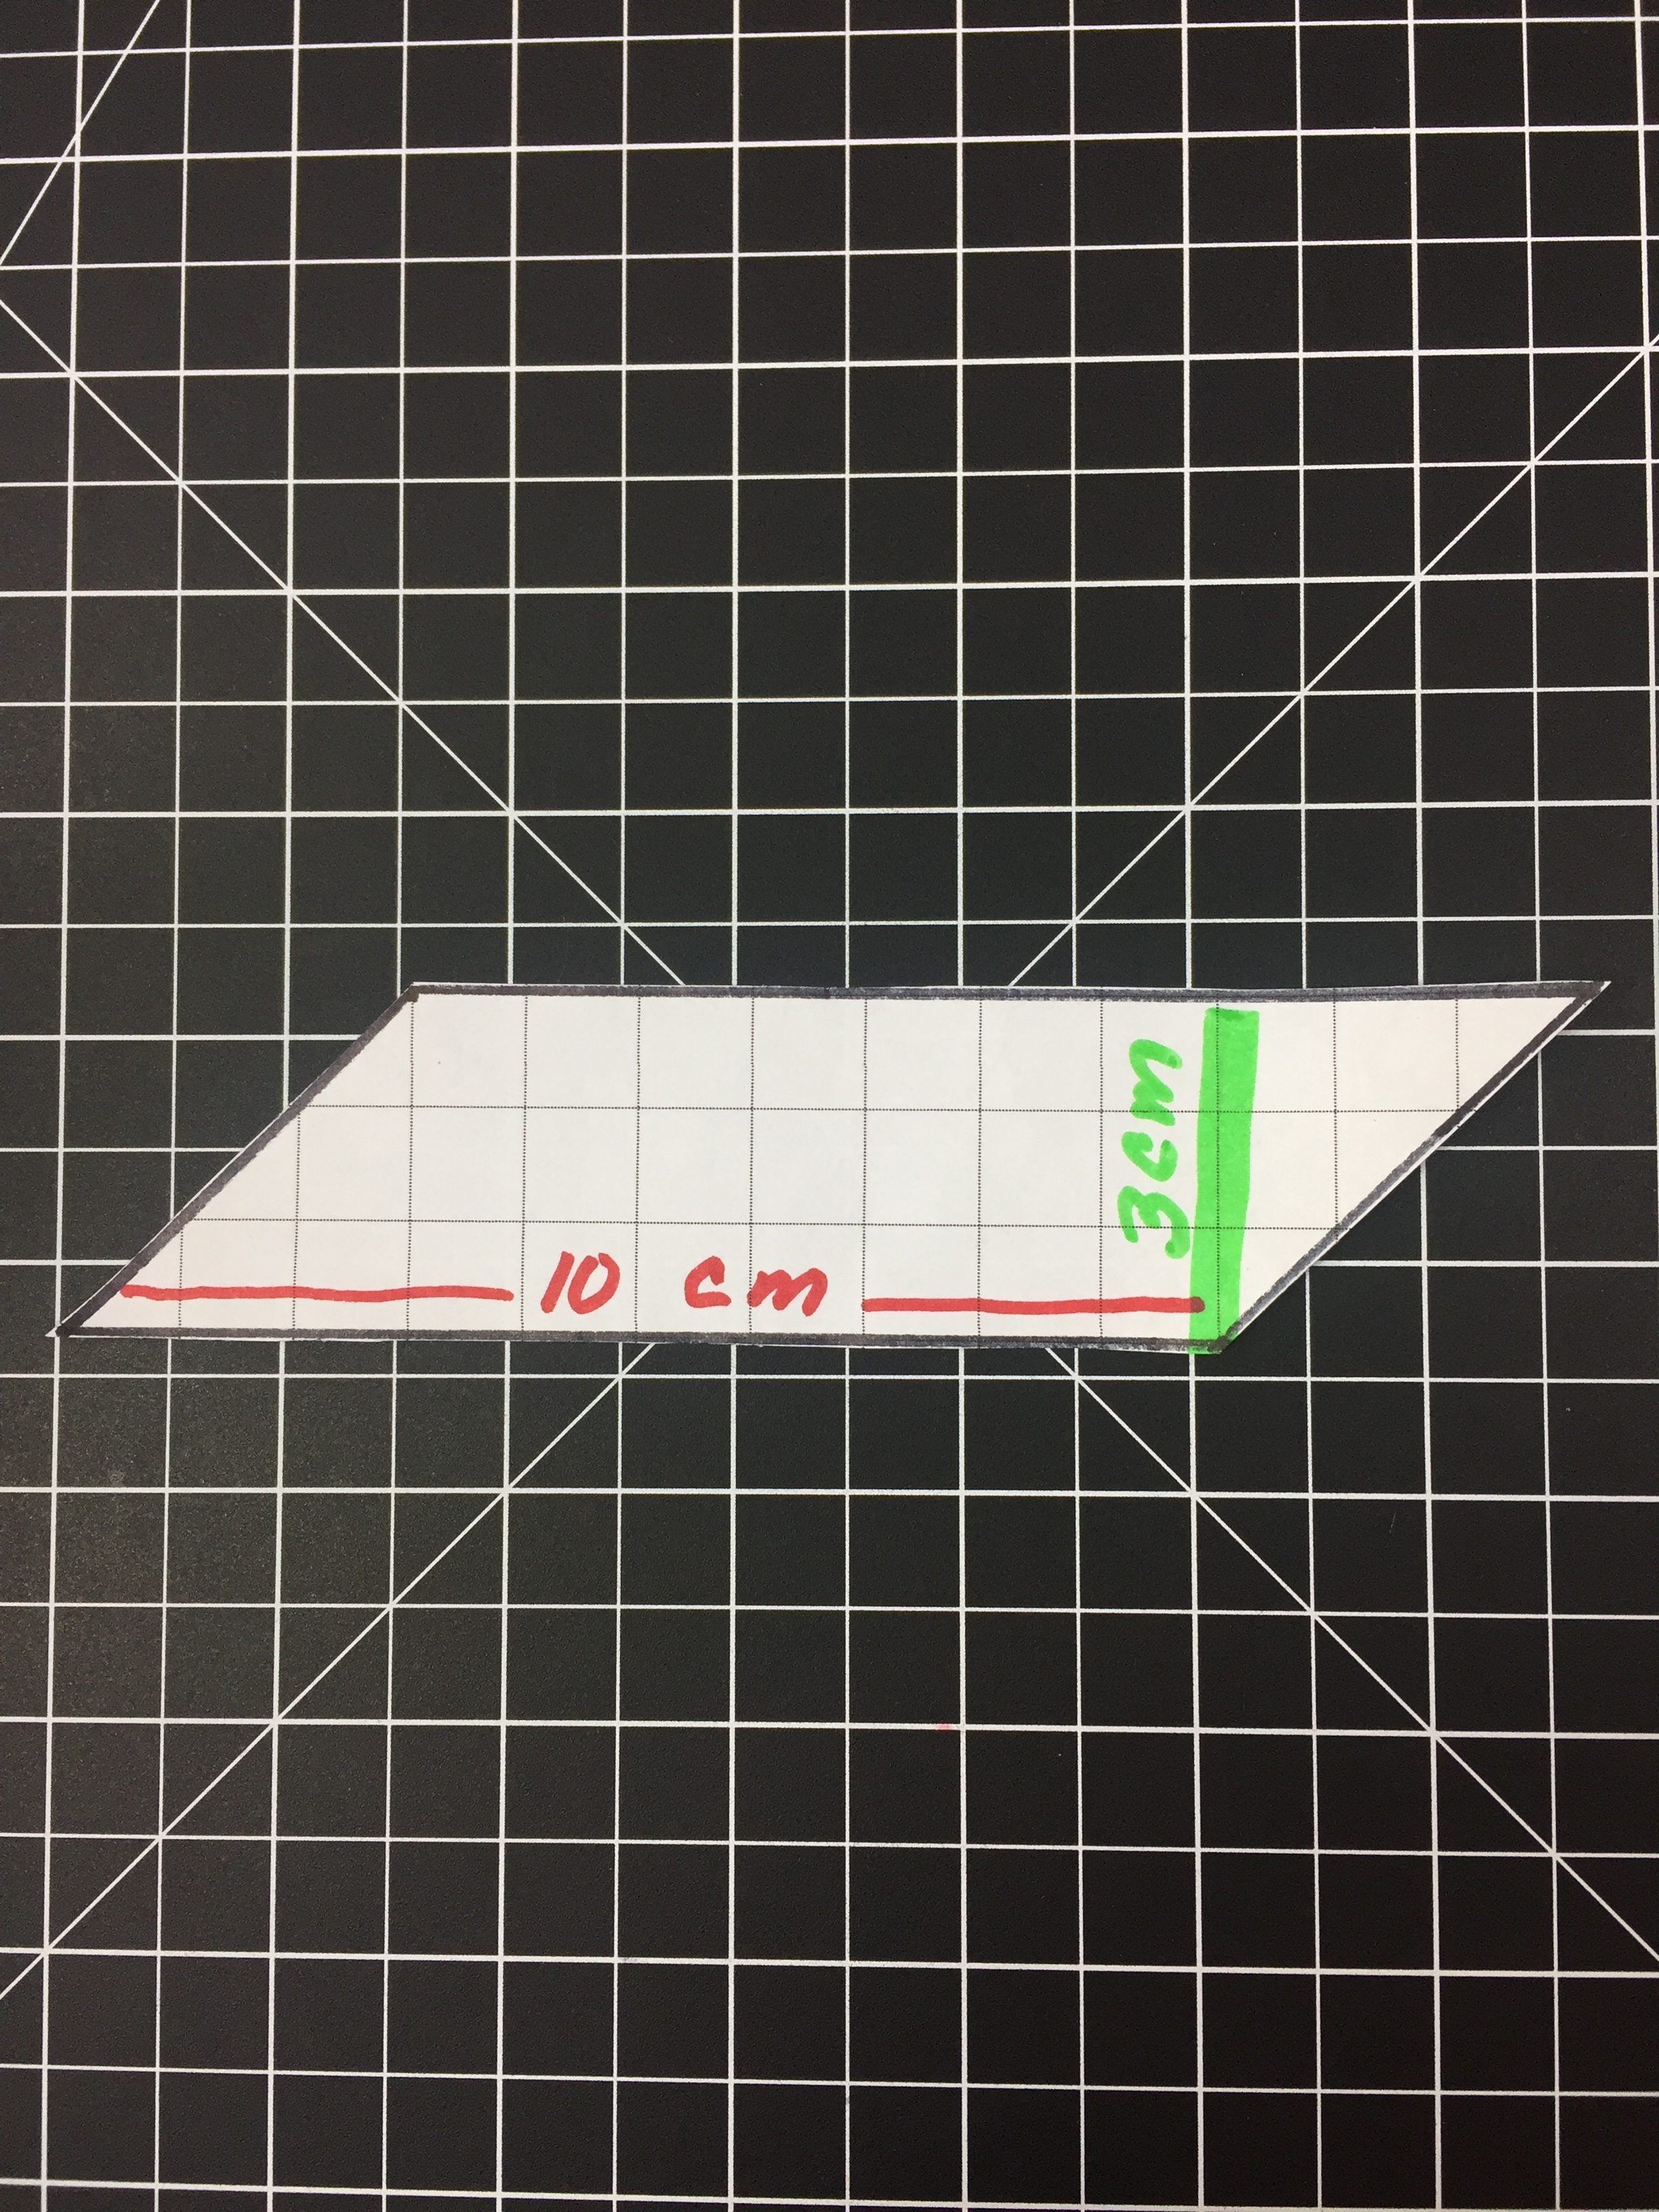
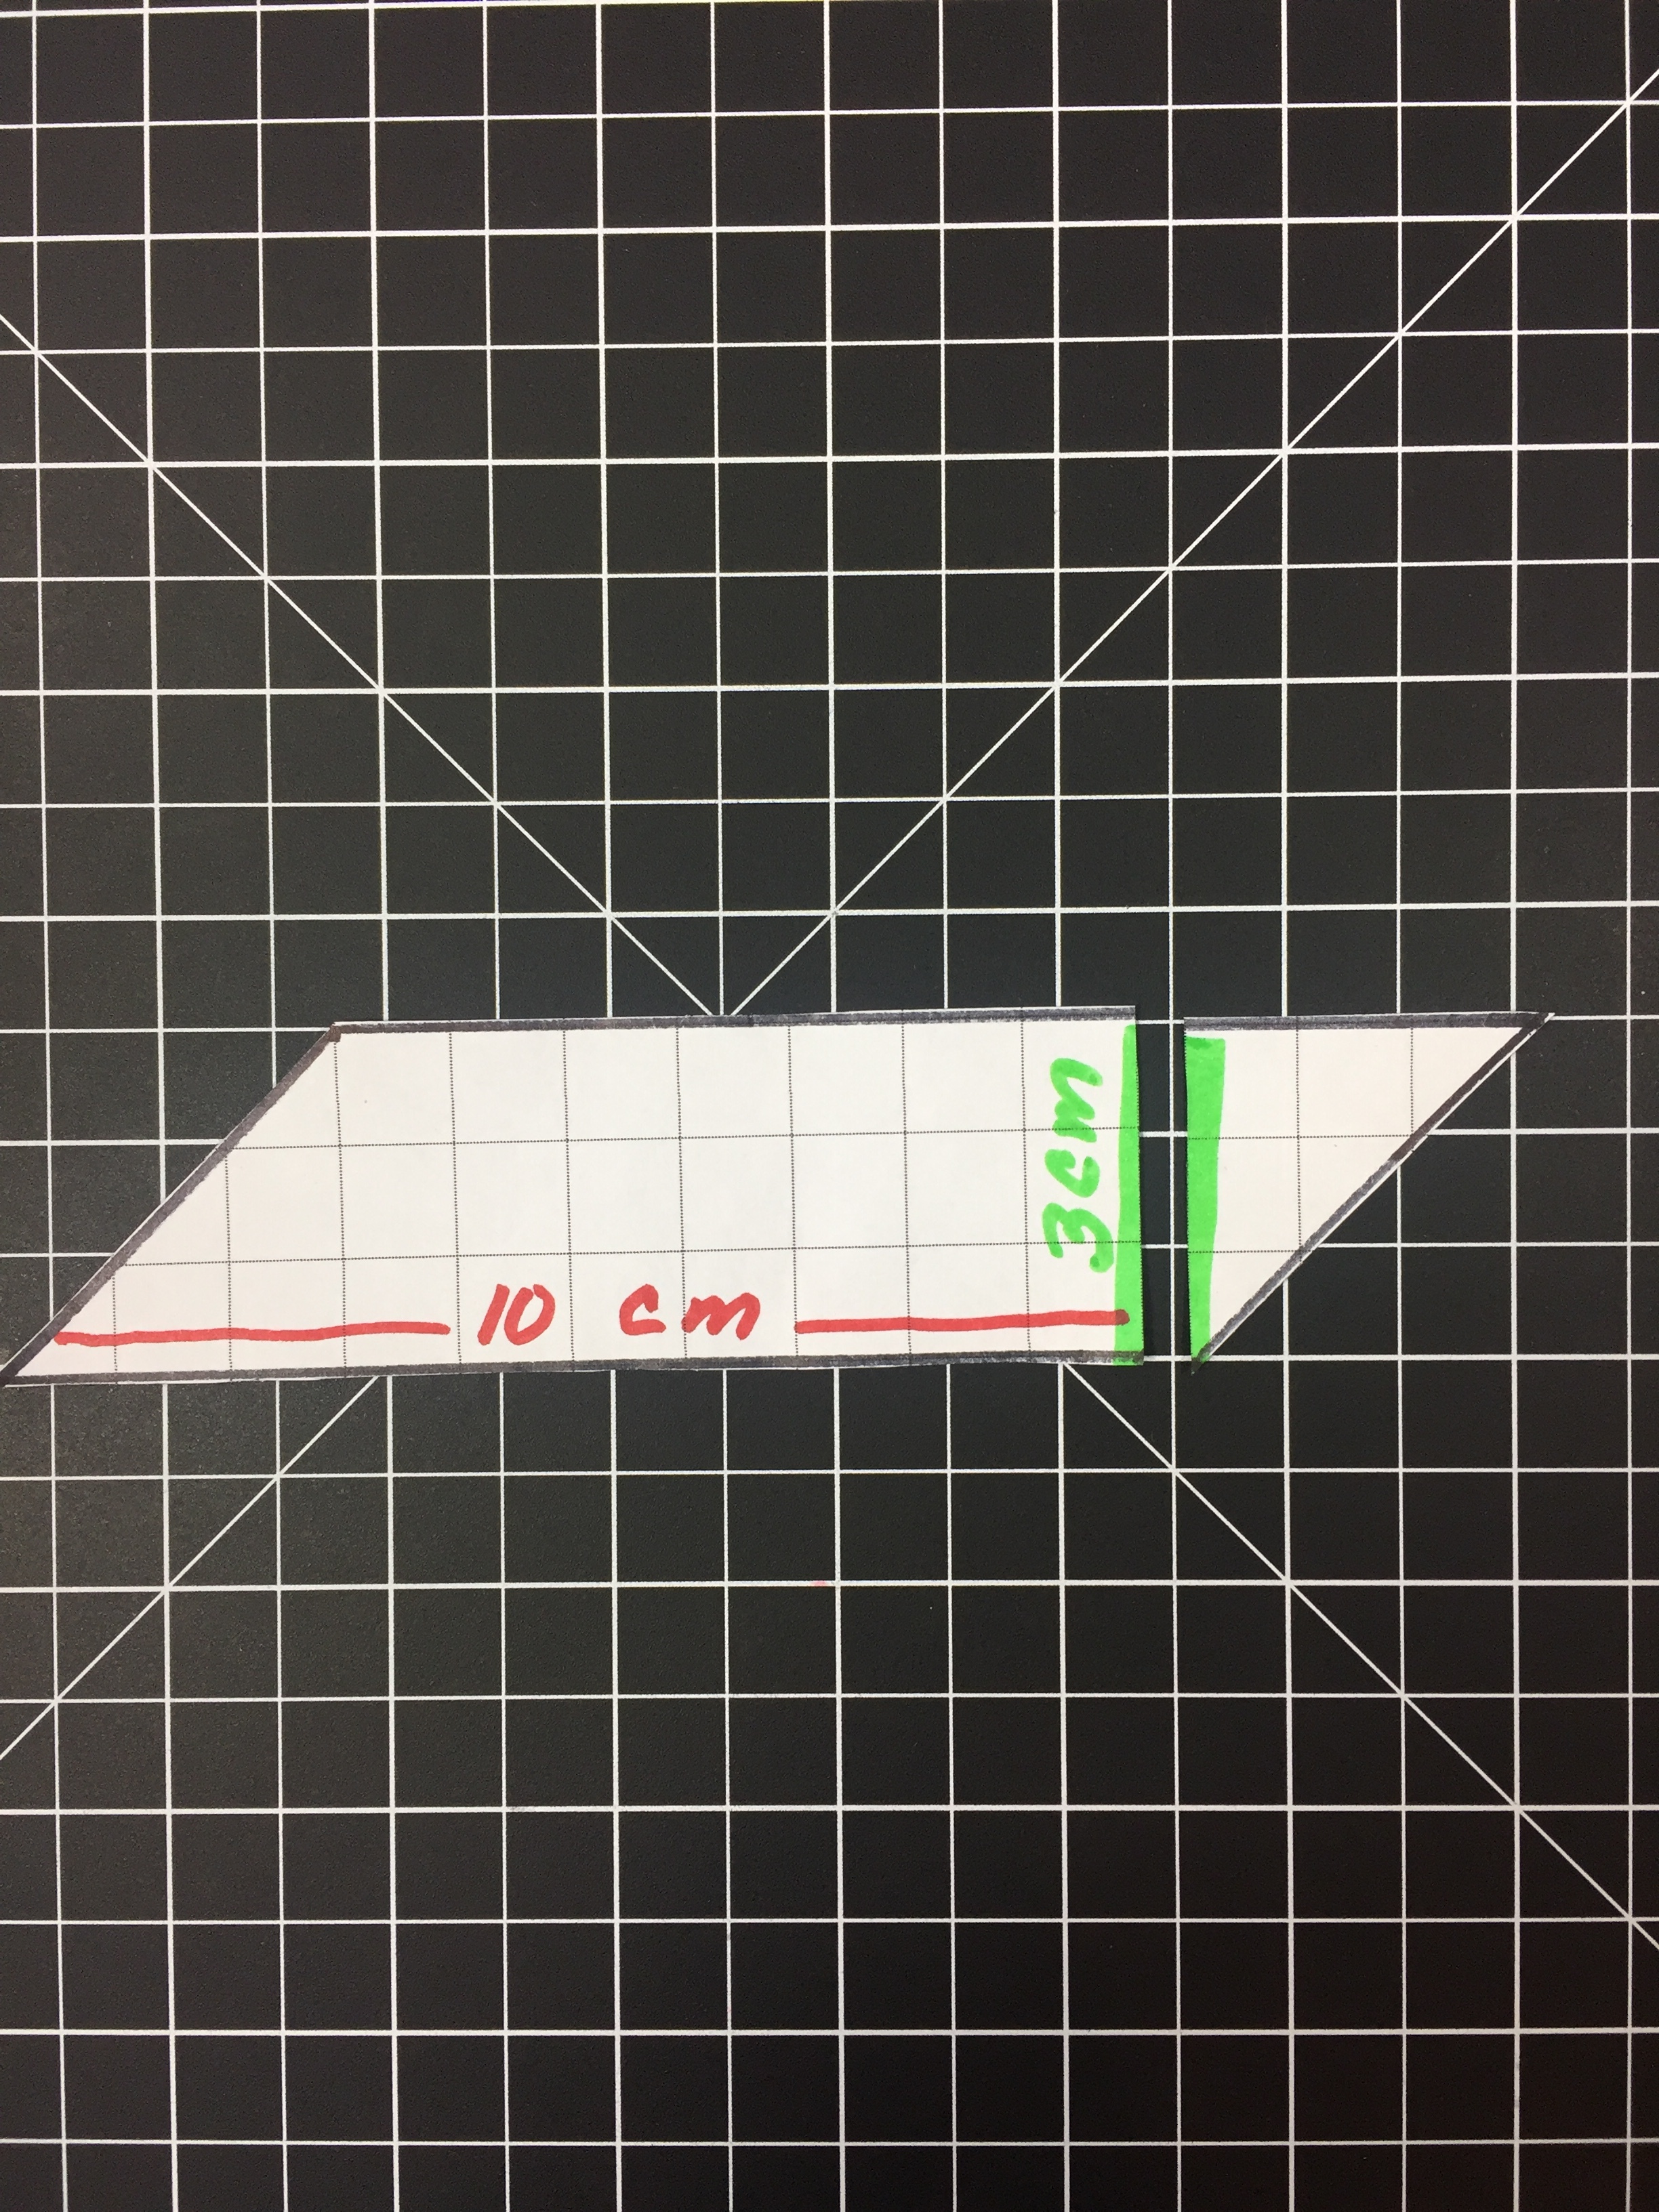
Below is another example of a parallelogram. We can take this parallelogram with a base of 10 and a height of 3 and cut into two parts by cutting on the height line. The two sections can be rearranged to form a rectangle with a base of 10 and a height of 3. By rearranging the Parallelogram we can visualize the 30 squares that make up the area.

We can model a Rhombus the exact same way by cutting into two parts (along the height) and then rearranging.
Length x Width vs. Base x Height
Is Length x Height the same as Base x Height?
The answer is Yes (sort of). It all depends on your perspective. On the image below left we are looking down on the rectangle. So, we would refer to these dimensions as the length and the width.
On the image below right we have changed our perspective of the rectangle. We are now looking straight ahead, so our dimensions are now base and height.
So Base and Length and Height and Width are basically the same.

When looking down on a rectangle we can see length and width.

When the same rectangle is upright (like above) we can visualize the height and base.
We hope you found this article helpful. You can follow us on:
Instagram, Pinterest, Twitter and YouTube at @landofmath
If you are looking for a more challenging activity for you kids check out "Finding Area of Unique Shapes" on Amazon.
This is a collection of 44 different shape combinations using rectangles, triangles, trapezoids, and circles.
The shapes progress in their difficulty.
You can check a video preview of this product below.